
Choose the Maths Skills and Materials
Choose the maths focus before selecting materials, so each putting task gives pupils a clear reason to count, calculate, measure or record. A simple target and a few reusable items can support maths mini golf activities without specialist equipment. UK Mini Golf Guide is an independent information guide, not a shop or provider of products or services. The choices below can be adjusted for different primary year groups and classroom spaces.
Match Skills to the Course
Choose one main skill for a task, then make the course activity produce information pupils can work with. These examples link a putting action to a specific maths focus.
- Count strokes: Ask pupils to count and mark each stroke as it happens; a short hole makes one-to-one counting visible without adding another calculation.
- Add scores: Have pairs combine the stroke scores from two holes, using the recorded values as the addends rather than estimating from memory.
- Compare totals: After pupils have scores for the same number of holes, ask who has the greater or smaller total and how they know.
- Measure a route: Give pupils a set unit, such as a ruler or metre stick, to measure a marked route and record its length.
- Record results: Ask pupils to enter each result beside the matching hole label, creating a clear set of values for later classroom discussion.
For KS1 mini golf activities, counting strokes or comparing small scores can keep the calculation straightforward; KS2 tasks can combine addition, measurement or recording. Pick a focus that fits the current maths objective and the pupils’ ability to read and use the numbers involved.
Choose Reusable Materials
Select materials for the room and the maths task: a few familiar objects can support classroom mini golf activities without specialist kit.
| Material | Classroom use | Setup needs | Maths supported |
|---|---|---|---|
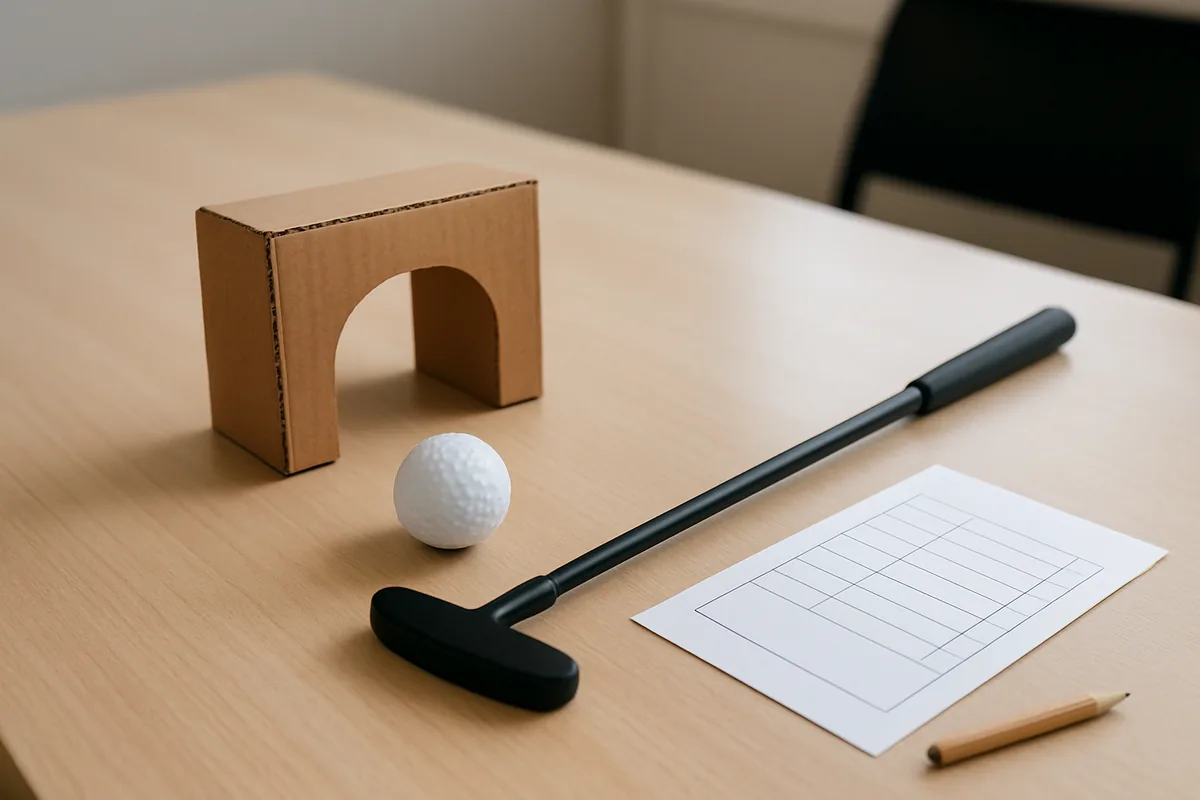
| Soft ball | A lower-bounce ball for putting on a classroom floor or table-top activity surface. | Choose a ball pupils can see against the playing surface; keep the same ball for comparable turns. | Counting strokes, comparing results and recording each attempt. |
| Visible target | A paper cup or a clearly marked target area gives pupils an easy-to-identify endpoint. | Place it where pupils can see it from the starting point; no powered or specialist equipment is needed. | Counting attempts and describing whether a putt reached the target. |
| Simple obstacles | A cardboard tunnel or a low book can create a route feature for a putting task. | Use objects already available in the room and select features suited to its open floor or desk space. | Shape and angle challenges, or comparing route measurements. |
| Score sheet | A printed or hand-drawn grid keeps pupil or team results together. | Use clear hole labels and enough writing space for stroke entries and totals. | Addition, comparison and later recording of results. |
For a compact room, a soft ball, visible target and paper record can keep the activity simple; a more open space can accommodate a cardboard tunnel or other low obstacle. Reuse familiar classroom materials and select only what serves the chosen maths focus.
Prepare a Score Sheet
Set out the score sheet with a space for each pupil or team name, followed by clearly labelled holes and separate entry boxes for strokes. Use the same hole labels wherever pupils record results, so a score can be matched to the correct task later. Leave a distinct total field rather than squeezing a sum beside the final hole entry. Keep the writing areas large enough for pupils to enter numerals legibly, and make headings easy to distinguish from the spaces for answers. A consistent layout helps pupils check which values belong in an addition, compare one pupil’s result with another’s, or return to the entries when recording class data. If teams share a sheet, provide a clear name field for each team and avoid mixing team scores in a single row; separate rows make each set of figures easier to read.
Prepare a Simple Classroom Course
A classroom mini golf course can turn an open part of the room into a practical setting for hands-on maths activities. A clear route helps pupils see where each turn begins and where the ball is meant to finish. The layout can use a direct path or a small number of simple obstacles, depending on the room and the group. Plan the route before placing equipment so pupils have room to take turns and move between activities.
Plan a Clear Route
Start by identifying a starting point and a target that pupils can see from where they will putt. Sketching the route on paper first can help check its direction and avoid crossing paths.
- Mark one starting point with a flat floor marker, such as a piece of tape, so pupils know where each attempt begins.
- Place the target at the end of the route where it remains visible from the start, rather than behind furniture or another obstacle.
- Keep the path between start and target clear enough for the ball to travel without entering a doorway or a busy walkway.
- Leave safe spacing around the route so a pupil putting and another retrieving a ball are not occupying the same space.
- Choose a waiting place outside the playing path, where pupils can see the target and know when their turn is approaching.
Walk the route from the starting point as a pupil would, checking that each direction is easy to follow. Ask a pupil to explain where to begin, where to aim and where to wait; revise any part that causes hesitation.
Choose Room-Suitable Obstacles
Choose obstacles that stay in place when a soft ball rolls against them and that fit the available floor area. A low cardboard box can form a broad barrier, while a pair of books placed flat can mark a gentle channel; keep edges smooth and avoid objects that roll or tip easily. Test each item with the ball before pupils use the course, since a light object may shift and change the route. An unobstructed route is often the most practical choice in a small classroom, for younger pupils practising how to direct a putt, or when several groups need a simple layout. It also makes the target and ball movement easier to see. A lightly varied route, with one broad turn or a single barrier, adds a decision without making the playing area crowded. For classroom mini golf activities, use only the variation that fits the room: remove an obstacle if it blocks the ball completely or leaves too little space for pupils to take turns.
Adapt the Layout Safely
A compact layout can use a short route along one side of the room, with the target close enough to remain visible and the waiting area set outside the ball’s path. Shorter routes suit restricted floor space better than trying to reproduce a longer course; use a direct line or one gentle change of direction, rather than adding several obstacles. Keep chairs, bags and unused equipment clear of the movement area so pupils can approach the start and leave the route without cutting across another turn. Before play, check the floor for loose items, make sure the target and any obstacle remain stable, and confirm that the intended path is open. Look at the course from the pupil’s starting position to verify that the target can be seen and that the route makes sense. Follow your school’s safety procedures and make any adjustments they require. The course is ready when the playing path, waiting place and access around the activity are clear, and the equipment stays where it was placed during a test roll.
Run the Activity Step by Step
A consistent sequence helps pupils focus on the putting task and the maths they record. For maths mini golf activities, explain the aim before anyone takes a turn, then show the class what one complete turn looks like. Give pupils time to play and note each result as it happens. Finish with a brief check that every player has a result to total or compare.
Follow the Activity Sequence
Use the same order for each group so pupils know when to play, record a result and move on. Keep the explanation brief, then check that pupils know what to do before play starts.
- Tell pupils the aim is to guide the ball into each target using the fewest strokes; finish this stage when everyone can explain what counts as completing a hole.
- Explain that every putt, including a miss, counts as one stroke; pupils follow the agreed order, and you confirm readiness when someone can state both rules.
- Demonstrate one full turn, saying the stroke count aloud as you putt; finish when pupils can identify the start, attempt and point at which the turn ends.
- Invite the first player to take a turn, then continue in order; this gives everyone a clear sequence, and the stage ends when each pupil has played once.
- Have the assigned recorder enter each player’s strokes immediately after the turn; this keeps results linked to the correct pupil, and completion means every finished turn has an entry.
- Repeat the play-and-record sequence for each remaining target, keeping the same turn order; move to the final check when every pupil has completed the course.
- Ask pupils to total their recorded strokes or compare results, as required; finish when each group can read back its figures and explain which result is higher or lower.
Keep the pace steady: pause after the demonstration for one rule check, then let pupils begin. The sequence is complete when every pupil has played and the recorded results can be read back.
Adapt the Maths Challenge
A mini golf score can become a flexible maths task by changing the questions pupils answer, rather than changing the whole activity. Early learners can count strokes and compare which result is greater or smaller; pupils ready for more can add scores across several turns. Measuring a route adds a practical way to use metres and centimetres, while a table makes results easier to compare. These maths mini golf activities can be adjusted to suit different levels of confidence without being tied to a particular year group.
Count and Compare Scores
Ask pupils to count each stroke as it happens, using a tally mark or a counter for every putt. At the end of a turn, they count the marks and say the score aloud; for example, four strokes means a count of 1, 2, 3, 4. Keeping one count for each player or hole makes it clear which number is being compared.
For an early counting prompt, ask, “How many strokes did you take?” Then offer a comparison: “Who has fewer?” or “Which score is higher, three or five?” Pupils can place two score cards side by side, order them from lowest to highest, or identify matching scores. A simple number line can help pupils point to the smaller number before explaining their choice.
Adjust the demand by using scores within a small range, such as one to five, or by asking pupils to compare larger counts after several turns. Invite confident counters to explain how they know one result is lower, rather than relying only on who finished first. In these mini golf maths games, fewer strokes means a lower score; make that convention explicit so pupils compare the numbers consistently.
Add Scores and Find Totals
When pupils are ready to work beyond single counts, have them add the strokes from two or more turns. If a player records three strokes on one hole and two on the next, they can write 3 + 2 = 5 and check that the total matches the marks on the score sheet. Adding each hole separately keeps the calculation connected to the recorded play.
Vary the arithmetic by changing the number of scores to combine, not by fixing a particular year group. Start with two small numbers, then use three or four entries, or include a turn with a higher count. Pupils who benefit from support can group counters to represent each score before combining them; others can calculate mentally and use the written entries to check their answer.
For a team round, combine each player’s recorded strokes to find the team total, then compare it with another team’s total. Ask, “What addition did you use?” and “How can you check the sum?” Pupils might recombine the numbers in a different order or recount the recorded strokes. These addition and totals tasks give pupils a clear reason to write an equation and verify it against their playing record.
Measure Routes and Record Data
Extend the activity by measuring the route from the starting point to the cup and recording the strokes for each attempt. Use the same unit and method for every route: a tape measure can show a straight distance, while a piece of string can follow a curved path before being measured. Pupils can enter the route length and each player’s strokes in a shared table, then compare the recorded distances and scores.
| Hole | Route length (m) | Player A strokes | Player B strokes |
|---|---|---|---|
| 1 | 1.5 | 3 | 4 |
| 2 | 2.0 | 4 | 3 |
| 3 | 2.5 | 2 | 3 |
Ask which measured route is longest or shortest, and compare the two players’ strokes on one named hole. Pupils can sort route lengths in order, spot a repeated score, or describe a pattern in the entries. For a simpler record, include one player and two columns; for a fuller comparison, add players or holes while keeping the unit and headings clear.
Common Setup Problems and Adjustments
Even well-planned classroom mini golf activities can slow down when pupils are unsure who plays next, gather around a hole or find that an obstacle has shifted. Small, visible adjustments can keep the route moving without changing the maths task. Use the school’s usual procedures when deciding where pupils wait and how equipment is handled. Check score records promptly so a missed or duplicated stroke does not carry through the activity.
Clarify Turns and Reduce Crowding
When pupils cannot tell whose turn is next, play can stall and the group may bunch around the ball. Make the order visible and keep waiting pupils away from the active route. Use these adjustments to organise turns and reduce crowding:
- Display a named turn order beside the starting point, so each pupil can see who plays now and who follows without calling across the room.
- Ask the next player to wait behind a clear marker until the previous pupil has finished and the route is ready for the next turn.
- Choose a waiting place outside the putting line, such as a marked spot beside the course, and have pupils remain there while another player takes a shot.
- Give one pupil responsibility for calling the next name, then rotate that role so pupils hear the same turn cue throughout the activity.
- If pupils crowd a narrow section, pause play and move the waiting group back to the designated place before the next shot begins.
- When traffic continues, remove a route feature or use fewer holes so pupils can move through the course without crossing an active putting line.
For younger groups, a simple name card moved after each turn can make the sequence especially clear. Follow the school’s procedures for managing pupils around shared equipment.
Stabilise Obstacles and Check Scores
A shifted obstacle can change the route between turns, while a hurried score entry can leave the record inconsistent with the play. Pause at the hole if a marker, box or other course item moves; reset it to its original position before anyone continues. If it will not stay in place, replace it with a stable alternative or remove it and adjust the route, rather than asking pupils to play around a moving object. Make changes when the route is clear and in line with school procedures. After each hole, compare the score sheet entry with the strokes the pupil actually took, including any additional attempts recorded under the activity’s scoring rule. Ask the pupil to confirm the count while the hole is still fresh, then correct a missed or duplicated mark immediately. If the player and recorder disagree, retrace the turns from the start of that hole together; do not carry an uncertain figure into the next entry. A quick check at every hole keeps the record consistent and makes later score totals more dependable.